
How to Reupholster a Chair or an Armchair: The Complete Step-by-Step Guide
To reupholster a chair, you strip it back to the bare frame, rebuild the foundation (webbing, then springs if the chair has them), pad it, cover it with your new fabric and finish the edges. Every chair follows these same stages, whether you work the traditional way with springs, horsehair and tacks, or the modern way with foam and staples. What changes from one chair to another is the order, the materials and the level of skill each stage asks for.
I’m Céline Vanier, an upholsterer trained through a four-year apprenticeship with the Compagnons du Devoir, working in my atelier on the shores of Lake Annecy since 2012. This guide walks you through the whole process, explains the difference between traditional and modern upholstery, and links to every detailed tutorial on the site, so you can find exactly what your chair needs, whether it’s your very first seat or your hundredth.
| The stages | Plan · Strip & prepare · Webbing · Springs · Padding · Calico & wadding · Covering · Finishing · Sewing |
| Two methods | Traditional upholstery (springs, natural fibres, tacks) · Modern upholstery (foam, wadding, staples) |
| Best first projects | Drop-in seat · Simple chair · Stool |
| Fabric | Free fabric calculator · Fabric guide |
| Learn in person | 2-day class · 5-day course |
| Tools | Tools guide · Materials guide |
On this page: Can a beginner do it? · Traditional or modern? · The 9 steps · Tools and materials · How much fabric? · Each type of chair · Common mistakes · Classes · FAQ
Can a beginner reupholster a chair?
Yes, as long as you choose the right first chair. A drop-in seat, a simple dining chair or a stool teaches you the essential skills (stripping, tension, cutting, corners) without the complexity of springs, arms and backs. Once those gestures feel natural, you can move on to a bridge chair, then a cabriolet, a bergère or a Voltaire armchair.
If you’re starting from zero, begin with Guide 1: Upholstery Tutorials for Beginners, read the safety rules for starting upholstery, and have a look at my 9 essential tips for starting upholstery. If a word is unfamiliar, the upholstery glossary gives you the English and French terms side by side.
And if you’re already a professional, this guide is also a map: every stage links to the techniques I use every day in my workshop, from tying springs the French two-way method to stitching an edge in horsehair.
What is the difference between traditional and modern upholstery?
Both methods give you a comfortable, beautiful chair. They differ in what goes inside the seat, how it’s built, and how it ages.
Traditional upholstery is the craft as it has been practised for centuries, and the way I was trained. The seat is built layer by layer on jute webbing: coil springs sewn and tied with laid cord, a layer of hessian, a first stuffing of coir or vegetable fibre, stitched edges that hold the shape, a second stuffing of horsehair, then calico, wadding and the final fabric, fixed with tacks. Every layer can be taken apart and repaired, which is why antique chairs can be restored again and again. The full sequence is detailed in the 16 steps of traditional upholstery.
Modern upholstery replaces most of these layers with foam. The seat sits on elastic webbing, sinuous springs or a solid base, the foam is cut to shape and glued, then wrapped in Dacron or wadding before the fabric is stapled on. It’s faster to learn and quicker to build, and it’s the natural choice for contemporary chairs. The quality of the foam makes all the difference: read which foam to choose for upholstery before you buy.
| Traditional upholstery | Modern upholstery | |
|---|---|---|
| Webbing | Jute webbing, tacked and stretched | Elastic webbing, or a solid base |
| Springs | Coil springs, sewn and tied with laid cord | Sinuous springs, or none |
| Padding | Coir or vegetable fibre, then horsehair, with stitched edges | Foam, often with a foam or fibre edge roll |
| Under the fabric | Calico, then skin wadding | Dacron or polyester wadding, calico optional |
| Fixing | Tacks | Staples |
| Best for | Antique and period chairs, restoration | Contemporary chairs, quicker projects |
Which method should you choose?
Let the chair guide you. An antique Louis XV cabriolet or a Napoleon III chair was designed for traditional upholstery, and its shape depends on it. A 1950s bridge chair or a modern cushion chair was built for foam. To understand the trade-offs in more detail, read how to choose the right padding for your upholstery project.
Can you mix both methods?
Yes, and it’s often the best solution. You can keep the traditional springs of an armchair and pad it with foam, or give a foam seat the generous, rounded shape of a traditional one. I show exactly that in modern foam upholstery with a traditional shape on a Voltaire armchair.
What are the steps to reupholster a chair?
Here are the stages in the order you’ll work through them. Each one links to its technique page in Guide 2: Core Upholstery Techniques, where you’ll find every step-by-step tutorial.
Step 1: Identify your chair and plan the project
Before you remove a single tack, know what you’re working on. Is it a drop-in seat or a fixed seat? Does it have springs? Is the padding traditional or foam? Which parts are visible wood? These answers decide your method, your materials and your fabric quantity. Start with the different types of chairs, then calculate your fabric with the free fabric calculator and choose it with the upholstery fabric guide.
Take photos of the chair from every angle before stripping it. The old cover shows you how the fabric was cut, where the seams were and how the corners were folded.
Step 2: Strip the chair and prepare the frame
Remove the old fabric, padding and webbing down to the bare wood, then check the frame: loose joints, broken parts, old tack holes, damaged finish. A chair is only as good as its frame, and this is the moment to repair it. See how to strip and prepare a wooden chair frame, with the tutorials on stripping, removing tacks and decorative nails, removing staples like a pro, gluing the wood back, fixing a broken arm and making the wood look new again.
Step 3: Web the seat
Webbing is the foundation of the seat: it carries the springs and the padding, and it decides how long the seat will keep its shape. Traditional upholstery uses jute webbing stretched tight with a webbing stretcher. Modern upholstery often uses elastic webbing. Everything is on the webbing tutorials page, including jute webbing with cuts around the legs and elastic webbing. To choose your webbing, see materials: webbings.
Step 4: Fit and tie the springs
Springs give a traditional seat its depth and bounce. They are positioned on the webbing, sewn to it, compressed and tied with laid cord so they all work together, then covered with hessian and sewn to it. It’s one of the most technical stages, and one of the most satisfying. Follow the springs tutorials page: positioning the springs, sewing them to the webbing, compressing them properly, tying them with the two-way method and sewing them to the hessian. For a lighter seat, there’s also a simple springing technique. To choose the right springs, read springs: upholstery materials.
In modern upholstery, this stage is skipped or replaced by sinuous springs, and the foam does the work.
Step 5: Pad the seat
Padding gives the seat its shape and its comfort. In traditional upholstery, you build a first stuffing of coir or vegetable fibre held by bridle ties, shape it with a regulator, stitch the edges to make them firm and straight, then add a second stuffing of horsehair. In modern upholstery, you cut the foam to size, glue it, and often add an edge roll for a crisp front. The padding and stuffing tutorials page covers both: first stuffing on a cabriolet chair, how to use a regulator, how to stitch a square angle, a foam seat with edge roll and a modern chair seat with foam. For the materials, see filling a seat with natural fibres.
Step 6: Add the calico and the wadding
Before the final fabric, a layer of calico holds the padding in shape and shows you every imperfection while it’s still easy to fix. Then a layer of wadding softens the surface and protects the fabric. On a traditional seat, calico is essential. On a simple foam seat, wadding is often enough. See white calico on a seat before the final fabric and polyester wadding on a seat.
Step 7: Cover the chair with the final fabric
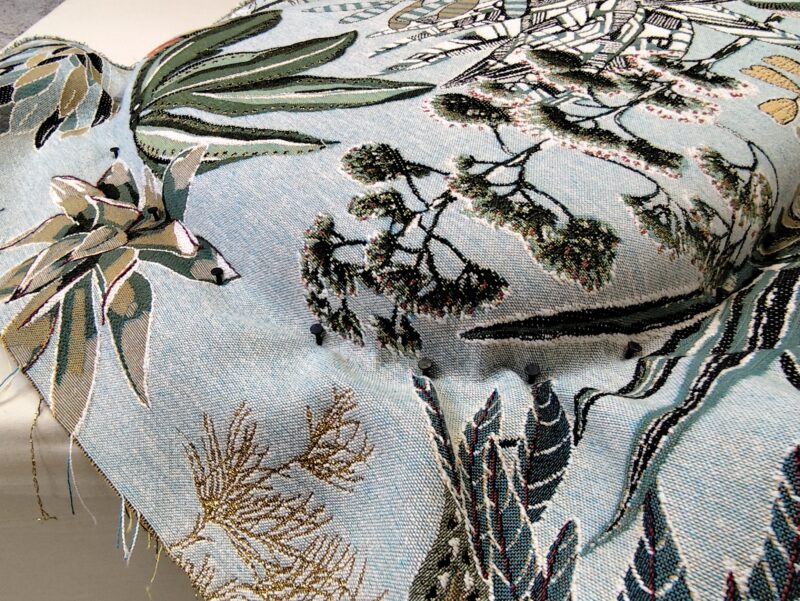
Covering is the stage everyone sees. The fabric goes on in a set order (seat, arms, inside back, outside back), centred, with the grain straight and an even tension worked from the middle outwards. Then come the cuts around the frame and the corners. Start with the covering tutorials page, then how to cut the fabric on a seat, how to cover the seat of an armchair, the guide to corners and pleats and 7 professional tips for a perfect outside cover. One habit makes all the difference here: temporary tacking, fixing loosely first and committing only when everything sits right.
Step 8: Finish the edges
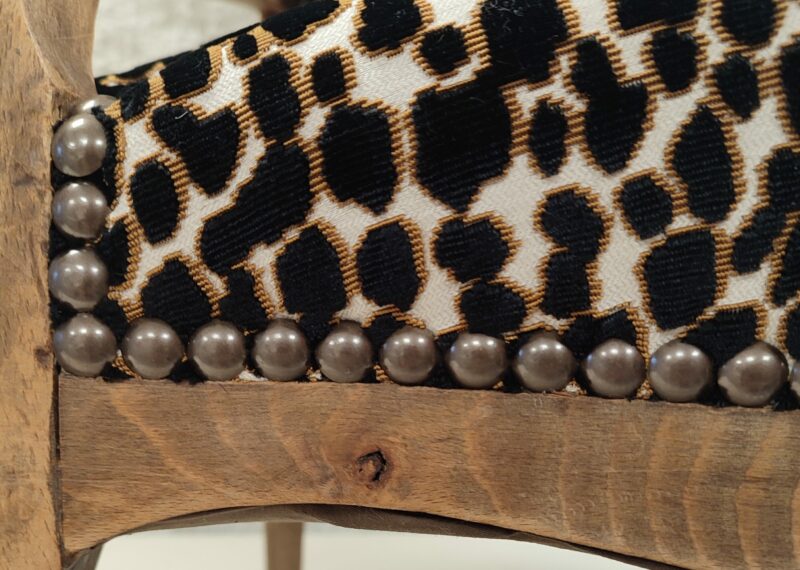
On a chair with visible wood, the finish hides the tacks or staples and gives the piece its character: decorative nails, braid or double piping. Underneath, a dustcover closes the seat neatly. To decide, read the different ways to finish a seat, then follow the finishing tutorials page: how to apply decorative nails, how to attach braid or double piping and how to fit a dustcover.
Step 9: Sew the cushions and piping, if your chair needs them
Bergères, club chairs and many modern chairs have a loose seat cushion, and some covers call for piping. That’s when sewing comes in. See the sewing tutorials page, including how to make a perfect seat cushion pattern, how to sew a boxed cushion and how to start attaching piping. A domestic machine isn’t always strong enough: here’s what to look for in a sewing machine for upholstery.
What tools and materials do you need to reupholster a chair?
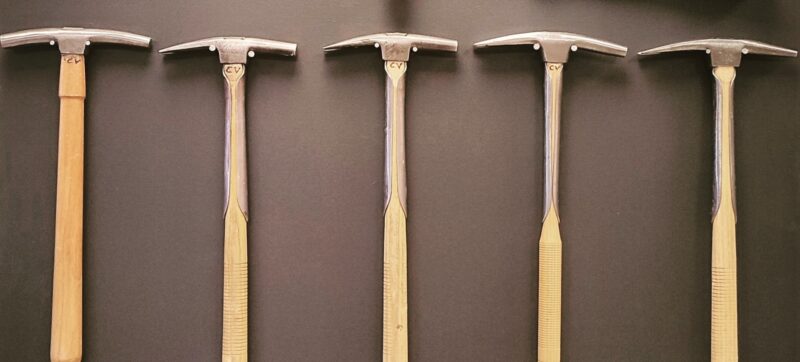
To start, you need a staple gun, a tack lifter and a mallet for stripping, a good pair of upholstery scissors, upholstery pins and a webbing stretcher. A tack hammer becomes essential as soon as you work the traditional way, and a regulator and long needles for stuffing and stitching. Everything is explained, with what to buy and what to avoid, in the upholstery tools guide and the upholstery materials guide. Specific guides: staple guns, hammers, tacks, pins and needles, basic manual tools and hessian. And to find good supplies, see where to buy upholstery supplies.
How much fabric do you need to reupholster a chair?
It depends on the chair, the fabric width and the pattern repeat. As a guide, for a fabric 140 cm (54 in) wide, a club chair takes about 5.5 m (6 yd) and a wingback chair 4 to 4.5 m (4⅜ to 5 yd). A drop-in seat or a dining chair needs far less. For your own chair, use the free fabric calculator, and always allow extra for a large pattern.
How do you reupholster each type of chair?
Each chair has its own logic: the sequence, the tensions and the cuts are different on a cabriolet, a bergère or a modern chair. These pages gather every tutorial for each one. You’ll find them all in Guide 3: Full Upholstery Projects and on the chairs tutorials page.
- Dining chair with a drop-in seat: the ideal first project, with the full drop-in seat tutorial.
- Simple chairs: fixed seats and backs, to master tension and corners.
- Stools and poufs: round, square or foam, perfect for practising.
- Bridge chairs: a compact classic, a great step up from a simple chair.
- Cabriolet chairs: exposed curved wood and traditional padding, where precision shows.
- Bergère chairs: enclosed arms, springs and a loose seat cushion.
- Voltaire armchairs: France’s most beloved armchair, in traditional or foam upholstery.
- Modern cushion chairs: clean lines, foam and sewn cushions.
- Club chairs: deep seats and rounded arms, a complete fabric change from start to finish.
What are the most common mistakes when reupholstering a chair?
- Skipping the frame repairs: new upholstery on a loose frame won’t last. Fix the joints before you web.
- Not enough tension: beginners rarely dare to pull hard enough, and slack fabric always shows as wrinkles.
- Fixing one full side at a time: it twists the fabric. Fix the centre of each side first, then work outwards, alternating sides.
- Not trimming enough at the corners: out of caution, beginners leave too much fabric, and the extra layers make lumps under the pleats.
- Using the wrong tacks or staples: too short and they won’t hold, too long and they split the wood.
- Buying cheap foam or skipping the calico: both shortcuts show up within months, in a sagging seat or worn fabric.
A site for beginners and professionals alike
I built this site so that everyone can find their way in it: the beginner restoring a first dining chair, the confident amateur ready for springs and horsehair, and the professional looking for a technique or a second opinion. Every tutorial in the Hammer Club is filmed step by step in my workshop, on real pieces, so you can follow along at your own pace, pause, rewind and come back whenever you need. If you’d rather learn hands-on, see the 2-day and 5-day classes below. And to know more about my background, see About.
Would you rather learn hands-on? Two class formats
Some gestures are easier to learn with someone beside you, correcting your hands. That’s why I teach small classes on the shores of Lake Annecy, in two formats. In both, you choose your technique (traditional or foam), the materials are included, and the tools are lent to you free of charge for the duration of the class. Beginners are welcome, and so are professionals who want to complete or refine their skills.
| 2-day class | 5-day course | |
|---|---|---|
| When | Friday and Saturday, 14 h in total | 5 consecutive days |
| Your project | The chair of your choice, or a square foam stool made from start to finish, covering and finishing included | A complete chair, from the bare frame to the final finish |
| What you learn | The key stages on a project you take home | Day 1 up to tying the springs, padding from day 2, then 2 days of covering and finishing, depending on the project |
| Technique | Traditional or foam, your choice | Traditional or foam, your choice |
| Included | Materials, tools lent free of charge | Materials, tools lent free of charge |
| Details and dates | See the 2-day class | See the 5-day course |
Not sure which one suits you? Compare both on the classes page, or read the upholstery course FAQ. Many students do both: they learn online with the tutorials, then join a class to work on a real chair with guidance, or the other way round.
FAQ
What is the easiest chair to reupholster?
A dining chair with a drop-in seat: the seat lifts out, you work on a flat, simple shape, and you learn tension, cutting and corners without any springs or arms. Start with the drop-in seat tutorial.
Do I need to remove the old padding?
You need to strip the chair far enough to check the frame and the foundation. On a traditional seat in good condition, the springs and part of the stuffing can sometimes be kept and refreshed. On an old foam seat, the foam has usually lost its strength and should be replaced.
Can I use foam on an antique chair?
Yes. Foam is a valid choice on an antique chair, as long as you respect its original shape. See modern foam upholstery with a traditional shape.
Do I need a sewing machine?
Not for every project. You’ll need one as soon as your chair has a loose cushion, piping or sewn panels, and it has to handle several thick layers. See the perfect sewing machine for upholstery.
Staples or tacks?
Staples are faster and are the standard in modern upholstery. Tacks are the traditional fixing, and they’re kinder to an antique frame that has already been upholstered several times. Read everything about tacks and the best staple guns for upholstery.
Can I learn upholstery online?
Yes. With clear, filmed tutorials and a good learning path, you can learn upholstery at home, one chair at a time. That’s exactly what the three guides are for: Beginners, Techniques and Projects.