
In short: stool upholstery means renewing the webbing, padding and fabric on a stool seat. It is the best first project in upholstery: a round or square stool on a wooden frame can be done in an afternoon with basic tools, and it teaches the techniques you will reuse on every chair. A foam pouf is the frameless alternative, built entirely from foam and fabric.
A stool is one of the most satisfying upholstery projects you can take on. The structure is simple, the process is quick, and the result is immediate. Whether you have a small round stool that needs a fresh cover, a square piano stool that’s seen better days, or you want to make a foam pouf from scratch, this is genuinely manageable territory even if you’ve never upholstered anything before.
If you’re looking for where to start with upholstery, a stool is the answer. Once you’ve done one, you’ll have the core skills to move on to a dining chair seat, a bridge chair, or even a cabriolet. The fundamentals are the same: good webbing, clean padding, even tension on the fabric, and neat corners.
What kind of stool do you have?
Stools come in a few different forms, and the upholstery approach varies slightly depending on the shape and structure. The three most common versions you’ll work with are the round stool on a wooden frame, the square or rectangular stool on a wooden frame, and the foam pouf built from scratch. All three are accessible, and all three follow the same basic logic.
Before you start: assess what your stool needs
As with any upholstery project, take a moment before stripping anything to figure out exactly what you’re dealing with. Is the padding still in decent condition, or has it completely collapsed? Is the webbing underneath still providing support? Does the wooden frame need any attention before you start building on top of it? On a stool, this assessment takes about two minutes and it will save you from making unnecessary work for yourself.
If the old cover is held with tacks or decorative nails, take them out cleanly so you don’t damage the frame: this guide to removing tacks and decorative nails shows how.
Tools and materials for stool upholstery
You don’t need a full workshop to upholster a stool. A tack hammer or a staple gun, a ripping chisel, scissors and a tape measure will cover most of the work. On the materials side, plan for webbing, foam or traditional stuffing, wadding, your top fabric and a bottom cloth to finish the underside, plus piping cord if you want a piped edge.
For a full breakdown of what each tool does and what’s worth buying first, see the complete guide to upholstery tools. For webbings, foams, stuffings and fabrics, the complete guide to upholstery materials explains what to choose and why.
Stool upholstery tutorials
Round stool on a wooden frame
The round stool is one of the neatest stool upholstery projects because the circular shape forces you to work cleanly: there are no corners to pleat, but the fabric needs to be gathered and tensioned evenly all the way around to avoid puckering. The finishing on a round stool is also a great introduction to hand-finishing techniques. This tutorial covers the full process, including how to finish the edge with a simple piping and a blind stitch by hand for a clean, professional result. If piping is new to you, start with the power of piping, and find more finishing techniques in the covering, sewing and finishing tutorials.
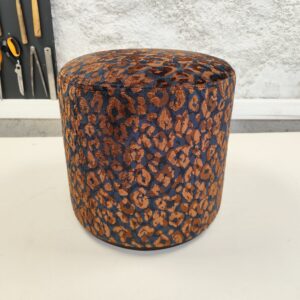
Rounded stool tutorial (wooden structure)
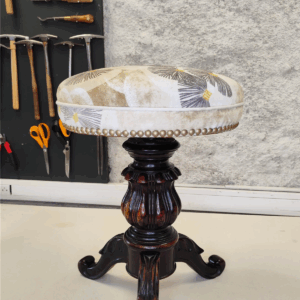
How to finish a round stool with a simple piping (Blind Stich by Hand)
Square stool on a wooden frame
The square or rectangular stool is the most straightforward stool upholstery project there is. Four straight sides, four corners to pleat neatly, and a clean underside to finish. If you’ve already worked through the squared corner pleat tutorial, you already know the key technique. For a crisp, firm edge on a foam seat, the foam seat with edge roll tutorial is a useful companion. The full step-by-step tutorial for a square stool on a wooden frame is here.
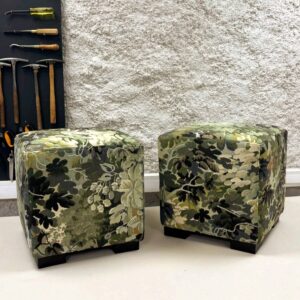
Squared stool tutorial (wooden structure)
Foam pouf: making one from scratch
A foam pouf is a slightly different project because there’s no wooden frame to work with. You’re building the structure entirely from foam, which means the cutting and shaping of the foam itself is the key skill. It’s a great project if you want something custom-sized, and the result is a piece that looks far more considered than anything you’d find in a shop. The how to make a foam pouf tutorial walks you through the full process, from cutting the foam block to the final cover.
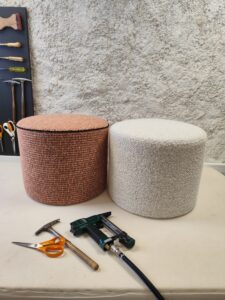
How to make a foam pouf
Fabric for stool upholstery
Because a stool takes direct wear, often without the protection of a cushion or cover, fabric choice matters more here than on most other projects. Prioritise durability: a tightly woven fabric, a performance fabric, or a good velvet will hold up far better than a delicate or loosely woven textile. Pattern-wise, everything works on a stool. A bold placed motif centered on a round stool top looks particularly striking. A graphic geometric or a strong stripe works well on a square stool. And if you want to keep it simple, a plain velvet in a good color is hard to beat. The upholstery materials guide covers fabric choice in more detail.
Stool upholstery FAQ
How much fabric do I need to reupholster a stool?
Measure the width of the seat, add twice the drop from the top of the padding to where the fabric is fixed underneath, then add about 10 cm (4 in) for handling and tensioning. Do the same for the depth. If your fabric has a placed motif, add extra so you can center it on the seat.
How long does it take to upholster a stool?
A simple round or square stool on a wooden frame usually takes an afternoon for a beginner. A round stool finished with piping and a hand blind stitch takes longer, and a foam pouf needs extra time for cutting the foam and sewing the cover.
Do I need to sew to upholster a stool?
Not for a square stool: the fabric is tensioned, pleated at the corners and fixed underneath. A round stool with a piped edge needs some sewing for the piping and a blind stitch by hand, and a foam pouf cover is sewn on a machine.
Should I use foam or traditional stuffing?
Foam is quicker and more forgiving for a first project. Traditional stuffing, such as coir or horsehair, suits antique stools and gives a more authentic shape. The padding and stuffing tutorials explain both approaches.
Can I upholster a stool without a staple gun?
Yes. Traditional upholstery uses tacks and a tack hammer, and that works perfectly on a stool. A staple gun is faster, but it’s not essential. The upholstery tools guide compares both.
Is stool upholstery a good starting point for a complete beginner?
Yes, without question. A stool is the most accessible upholstery project there is, and it teaches you the foundations you’ll use on everything that follows. Good webbing, clean padding, even fabric tension, neat corners or gathering: these are the building blocks of every upholstery project, and a stool lets you practice all of them on a small, manageable scale with a quick, satisfying result.
If you want to work through a structured introduction to upholstery, start with the upholstery tutorials for beginners, then the upholstery beginners guide with 3 full projects. If you like learning from books too, here are the best upholstery books for beginners. And when you’re ready to move on to a chair, start with a simple dining chair seat or a bridge chair: the skills carry over directly.
Written by Céline Vanier, upholsterer trained with the Compagnons du Devoir, running her own upholstery workshop near Annecy, France, since 2012.
All the tutorials on this page are available in full through the online membership, with video and step-by-step photos for every stage.