
Padding: Building Comfort and Shape
Padding is where the seat takes its form. Everything before this stage – the webbing, the springs – was structure. This is where comfort begins, where the eye starts to see the shape, and where the hand of the upholsterer becomes truly visible.
Before you start padding, your foundation must be complete. If you have not yet done your webbing or your springs, start there first: the padding can only be as good as what sits underneath it.
Webbing techniques: link
Spring techniques: link
Padding With or Without Springs
Padding works differently depending on what it sits on. On a sprung seat, the padding builds on top of the burlap-covered spring deck: its role is to refine the shape and add a comfort layer over an already resilient base. On a sprungless seat, the padding must create both the support and the comfort from scratch, directly on the webbing.
In both cases, the same materials and techniques apply. What changes is the thickness, the layering logic, and the amount of work needed to achieve the right result.
Traditional Padding – Natural Materials
Materials: coir fibre, horsehair, cotton felt and more
Traditional upholstery padding uses natural materials built up in layers: coir fibre and vegetable tow as a first stuffing to create volume, horsehair as a second stuffing for refinement and resilience, and cotton felt or skin wadding as a final layer to smooth everything before the fabric goes on. Each material has a specific role and a specific place in the sequence. Understanding why the layers exist is what allows you to adapt them to any piece.
Traditional padding materials: link
Tools you will need for traditionnal padding
- Curved and straight mattress needles for stitching bridle ties, edge rolls, and through-stitching the padding.
- The regulator : an essential tool unique to traditional upholstery. A long, flat-ended metal spike used to redistribute and even out the filling through the burlap without removing it. It is how you correct lumps, adjust density, and refine the shape before stitching. Every traditional upholsterer uses one constantly.
- Upholstery twine for bridle ties and edge stitching.
- Jute burlap / hessian as the first layer over the springs or webbing, before the stuffing goes on.
- Upholstery pins to hold layers in place temporarily while you work.
- Scissors and cutting shears for trimming burlap, calico and wadding cleanly.
Traditional Padding Tutorials
Traditional stitched seat upholstery
STEP 1: First Stuffing on a Seat
The first stuffing is the foundation of any traditionally padded seat. Using bridle ties sewn into the burlap, natural fibre – coir, tow or vegetable hair – is anchored in place and built up to create the basic volume and dome of the seat. This is where the shape begins. Getting the density and the crown right at this stage saves a great deal of correction later.

First stuffing on a cabriolet chair
Step 2: How to Stitch an Edge Roll on Traditional Upholstery Padding
The stitched edge roll is one of the defining marks of traditional upholstery. It is a firm, defined edge built directly into the padding using a long mattress needle and twine. The result is a sharp, durable edge that holds its shape under the fabric and gives traditionally upholstered furniture its characteristic silhouette. A fundamental technique that every serious upholsterer needs to master.
Arms on a Cabriolet Chair with Horsehair
Arms require a different approach than seats, the surface is smaller, the curves are more complex, and the padding must stay in place without bulk. This tutorial shows how to build the arms of a cabriolet chair using horsehair over a calico base, one of the most refined gestures in traditional upholstery and a technique that applies to many classic French and English chair styles.

How to create arms with horsehair
How to Stitch a Square Angle in Traditional Padding
Square angles are one of the most demanding challenges in traditional upholstery padding. Getting a perfectly crisp corner that holds its shape requires a specific stitching sequence and a precise use of the regulator. This tutorial breaks it down step by step, clearly enough to follow on a real piece.

Well Back — Traditional Back Padding Tutorial
Upholstering a traditional well back – the padded inner back of a fully upholstered armchair – is a technique with its own logic and its own sequence. The padding must be built evenly across a vertical surface, held securely in place, and shaped to receive the covering fabric without shifting. This tutorial covers the full process from the first layer to the finished calico stage.

Well back tutorial
How to Stitch a Perfect Junction When Padding a Seat
When stitching the padding of a seat, the junction between the front edge and the sides is one of the trickiest points to get clean. This tutorial shows the exact technique to achieve a sharp, seamless transition, the detail that separates a professional result from an amateur one, and that makes all the difference once the fabric goes on.
First stuffing on a cabriolet chair
How to Pad a Small Chair with fibers the Easy Way (coming soon)
Not every chair needs a complex traditional build. For small salon chairs and simple seats, there is a faster, more accessible approach that gives a clean and comfortable result without the full traditional sequence. This tutorial shows how to pad a small chair efficiently – ideal for beginners tackling their first real piece or for professional work on less demanding frames.
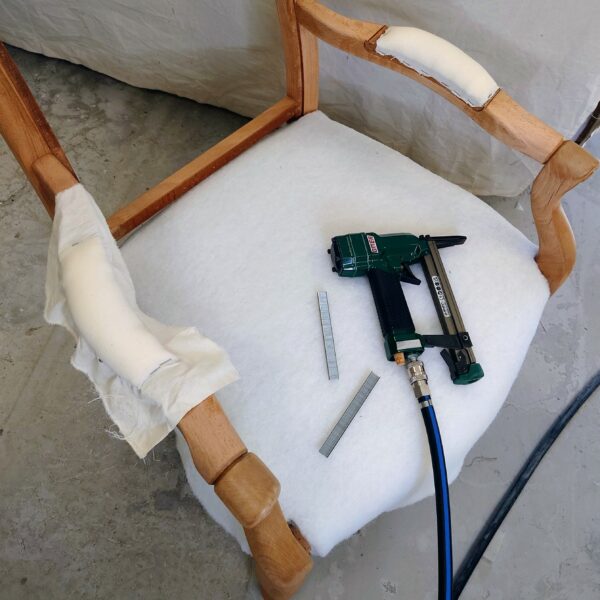
Modern Padding: Foam
Materials: foam, Dacron, edge roll and wadding
Modern upholstery padding centres on foam but foam is not one single thing. Density, firmness, thickness and the way layers are combined all produce very different results. A single dense block gives a firm, graphic seat. A layered build with softer foam on top and Dacron wrapped around creates something that reads as a deep, generous cushion. Knowing how to select, cut, layer and finish foam correctly is a skill that takes real practice and the results can be just as beautiful as traditional work when the choices are right.
Foam and modern padding materials: link
Tools you will need
- Electric carving knife or foam cutter for cutting foam cleanly and accurately. A sharp blade makes all the difference on thick blocks.
- Contact adhesive (foam glue) for bonding foam layers together and fixing foam to frames or edge roll.
- Upholstery edge roll to create a defined, firm perimeter around the seat before the foam goes on (if you need a foam padding higher than 5 cm).
- Staple gun for fixing Dacron and calico to the frame.
- Scissors and a long ruler for marking and cutting Dacron and wadding accurately.
Modern Padding Tutorials
How to Take a Template for Cutting Foam
Before any foam can be cut, the seat shape must be transferred accurately onto the foam block. This tutorial shows how to take a clean template from any seat frame – straight, curved or irregular – so that the foam fits perfectly from the first cut and does not need to be trimmed and adjusted repeatedly.
How to change the foam on a dining chair
These kind of drop-in seat are one of the most common foam job in upholstery and the one most people attempt first. A dining chair seat is small, the frame is straightforward, and the result is immediately visible. This tutorial shows how to remove the old foam cleanly, choose the right replacement density for a seat that will be sat on daily, cut it accurately to the frame, and finish with Dacron before the fabric goes on. A simple project done properly makes a remarkable difference to both the look and the comfort of a chair that gets used every day.

How to reupholster a dining chair seat for beginners (drop-in seat)
How to Pad a wooden frame with Foam
A simple, efficient method for padding a small chair, a back, or drop-in seat with foam. This tutorial covers foam selection, cutting, fixing and finishing with Dacron the complete modern approach for a clean, comfortable result on a simple frame (plane wooden surface, any back or seat). A great starting project for anyone new to foam work.

How to upholster this little chair easily
How to Create a Foam Seat on an Armchair (with Edge Roll) on a cabriolet chair
This tutorial covers the complete process for building a foam seat on a sprung or sprungless armchair frame, including how to use edge roll to create a clean, defined perimeter before the foam goes on. The result is a firm, well-shaped seat with neat edges that hold their line under the fabric.

How to do a foam seat with edgeroll
How to Create a Front Foam Edge (for Seats with Cushions and Sofas)
On seats designed to receive a loose cushion – sofas, deep armchairs, platform seats – the front edge of the deck needs its own foam build to support the cushion properly and give the piece its shape. This tutorial shows how to create a front foam edge that is firm, well-defined and perfectly proportioned, whether you are working on a single chair or a full sofa.

How to create a front edge platform
How to Make Arms with foam
Very useful if you want to cover a cabriolet or bergere arms with foam.
The easiest way to upholster arms with foam
Foam Pouffe Projects
You can create some fun little Pouffe with foam.
How to Make a Round Foam Pouffe
A fully foam pouffe is one of the most satisfying projects to make from scratch: no frame, no springs, no webbing. Just foam, cut and assembled into a solid, stable form, then wrapped and covered. This tutorial shows the full process, from cutting the foam correctly to achieving clean, round edges before the fabric goes on.

How to make a foam pouf
How to Upholster a Round Pouffe with a Wooden Structure
When a pouffe has a wooden base or frame, the approach changes, the foam must work with the structure rather than replace it. This tutorial covers how to pad and shape a round pouffe built on a wooden form, including how to handle the curves and get a smooth, professional result before covering.

Rounded stool tutorial (wooden structure)
What Comes Next?
The padding is done, the seat has its shape, its volume, its comfort.
Now comes the part that everyone sees: the fabric, the cuts, the corners, and all the finishing details that define the quality of the final piece. Covering and finishing is where piping is sewn and applied, where pleats are folded, where gimp or decorative nails complete the edge, and where the outside back and outside arms are closed. It is also where the base cloth is fitted underneath: the last gesture before the piece leaves the bench.
Cushion Interiors – Loose Cushions and Scatter Cushions
A loose cushion is only as good as what is inside it. The interior determines the shape, the feel, the way it holds up over time, and whether it looks plump and inviting or flat and tired after a few months of use. This section covers the main approaches – natural fillings and synthetic – for both seat cushions and decorative scatter cushions.
Natural Fillings – Feather and Down
Feather and down interiors are the most luxurious option for loose cushions. They are soft, generous, and give that characteristic slightly yielding feel that foam and synthetic fillings cannot replicate. The key is in the construction: a well-made feather interior uses internal walls called baffles or channels that prevent the filling from migrating to one side and keep the cushion evenly filled over time.
How to Make a Baffled Feather Cushion Interior
This tutorial covers how to sew a cushion interior with internal baffles. This technique is used for high-quality seat cushions and back cushions on sofas and armchairs. The baffled construction keeps the feathers evenly distributed, prevents the cushion from going flat in the centre, and gives a consistently plump, well-shaped result. The same method works equally well for decorative scatter cushions where a soft, full look is needed.

How to create a feather seat cushion
Synthetic Fillings – Polyester Fibre and Foam Combinations
Synthetic cushion interiors are more accessible, easier to maintain, and perfectly suited to many projects from simple scatter cushions to full seat cushions on everyday furniture. The result depends entirely on the quality of the filling and the construction of the interior. A poorly made synthetic interior goes flat quickly. A well-made one holds its shape and its volume for years.
How to Make a Simple Polyester Fibre Cushion Interior (or feathers filled)
The simplest and most versatile cushion interior a fabric case filled with polyester fibre. This tutorial covers how to calculate the right amount of filling, how to sew the interior correctly so it holds its shape, and how to get that plump, full look without overstuffing. Suitable for scatter cushions, back cushions and anywhere a soft, relaxed feel is the goal.

How to sew a simple inside cushion
How to Make a 3-Layer Seat Cushion Interior for Maximum Comfort and Shape
For seat cushions that need to hold their shape under load – on a sofa, a deep armchair, or a window seat – a simple fibre filling is not enough. This tutorial shows how to build a three-layer interior that combines a firm foam core for support, a softer foam or fibre wrap for comfort, and a final Dacron layer for that slightly rounded, generous silhouette. The result looks beautiful, sits beautifully, and holds its form over time, the professional standard for any upholstered piece with loose seat cushions.

How to create a perfect 3 layers foam seat cushion
→ Covering & Finishing
Fabric placement, tension, cuts at the legs and arms, pleats, piping, gimp and decorative nails — covering is where all the previous work becomes visible. A well-covered seat makes everything look right.
→ Tools & Materials
Not sure which foam density to choose, or which natural fibre suits your project? The tools and materials section covers everything you need before you start.
All of these techniques are available in full detail inside the membership. Every tutorial is filmed step by step, so you can follow along at your own pace, pause, rewind, and come back whenever you need a refresher.
Your Upholstery Journey in 3 clear guides
Start simple, learn the right techniques, then move to real projects. A clear method, built to last.