
The bergère is one of the most iconic French armchairs, and one of the most rewarding to restore. Fully upholstered on all sides, deep and generous in its proportions, it’s a chair that transforms a room when it’s done well. It’s also a step up in complexity from a cabriolet or a bridge chair: the seat cushion involves sewing work, the back requires careful padding and clean finishing, and the number of separate elements to manage is higher. But the process is logical, and if you take it one step at a time, it’s absolutely achievable.
This page walks you through every stage, from assessing your chair before you strip anything to the final covering. Take a moment to read through the whole thing before you start. Knowing where you’re going before you pick up a tool makes every step easier.
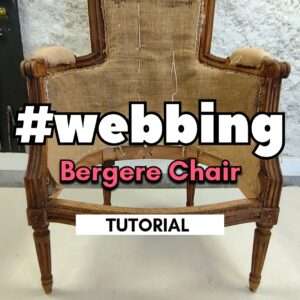
What is a bergère chair?
A bergère is a fully upholstered French armchair with closed, padded sides. Unlike a cabriolet, which has open sides and exposed wooden arms, the bergère is upholstered all the way around: the back, the seat, and both side panels are covered. The seat is almost always a separate cushion rather than a fixed padded seat, which is one of the key differences from other armchair styles. It comes in many shapes and sizes, from compact versions to large, deeply comfortable statement chairs, but the principle is always the same.
If you’re not sure whether your chair is a bergère or a cabriolet, check the sides. If the space between the armrest and the seat is upholstered and closed in, it’s a bergère. If you can see through to the wooden frame on the sides, it’s a cabriolet.


Before you strip anything: assess your chair first
This is the step most people skip, and the one they most often regret. Before you remove a single tack or pull off any fabric, go through the chair methodically. Is the back padding still in decent condition? Are the side panels solid or collapsed? Does the cushion just need a new cover, or does the inside need replacing too? Are the springs still functional, or do they need attention?
Many beginners strip a bergère completely only to realise the back padding was perfectly fine and didn’t need touching. Know your plan before you start. It saves time, materials, and a lot of frustration. For stripping and preparing the frame, start here once you know exactly what needs to come off.
How much fabric do you need?
For a standard European-size bergère, plan for 3 to 4 metres of fabric at 140 cm wide. If your fabric has a large pattern repeat or if you want to place a motif carefully on the back and cushion, allow for a little more. It’s always better to have extra than to run short mid-project.
For finishing, you’ll need either a box of decorative nails or between 9 and 11 metres of braid or double welting cord to trim the edges. If you want piping around the seat cushion, allow around 8 metres of simple piping cord. These are options, not obligations, but they make a real difference to the final result.
Fabric choices for a bergère
The bergère is one of the most versatile chairs when it comes to fabric. The large surfaces give you real room to work with pattern and texture, and almost everything works if it’s chosen with intention.
A plain cotton velvet is one of the most reliable choices: it suits the chair’s classic silhouette, wears well, and looks rich without being fussy. Woven patterns, jacquards, damasks, and toile de Jouy all work beautifully. Large-scale prints have real impact on a bergère because the back and side panels give them room to express themselves fully. Small repeats work too, particularly if you want a more discreet, lived-in result. The cushion cover is also an opportunity to place a motif deliberately, centering it on the top panel for a considered, tailored look.
Unlike the cabriolet, the bergère can handle a wider range of textures because the exposed wood frame is less prominent. That said, very chunky or loosely woven fabrics are still best avoided: they’re harder to tension evenly and don’t hold up as well over time on a chair that gets regular use.
Step one: the seat base
The bergère seat sits on either elastic or traditional webbing, with or without coil springs depending on the chair’s original construction. This is your foundation, and it needs to be solid before anything else goes on top.
Option 1: elastic webbing
The simplest and most practical approach for most bergère chairs. Follow the elastic webbing tutorial here.
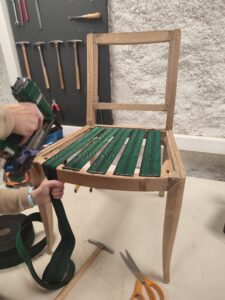
How to web with elastic webbing
Option 2: traditional webbing with coil springs
If your chair originally had springs and you want to restore it properly, start with traditional webbing, then move on to positioning the springs, tying them, and sewing them to the hessian.
Traditional webbing a bergere chair
Step two: the seat cushion
This is where the bergère differs most from simpler chairs like the bridge chair or a basic dining chair. The seat is almost always a removable cushion, and making that cushion involves sewing work. You’ll need to cut and sew the cover before you can stuff and close it. Take your time with this stage: a well-made cushion cover is the difference between a professional result and one that looks homemade.
Foam cushion
A foam cushion is firmer, holds its shape better over time, and is easier to maintain. It’s a good choice for a chair that gets used regularly. Follow the foam cushion tutorial here.
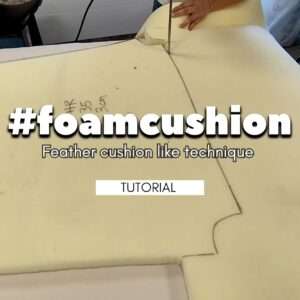
How to create a feather like FOAM cushion
Feather cushion
A feather cushion is softer, more generous, and has that classic sinking-in feeling that makes a bergère so comfortable. It’s the more traditional option and suits period chairs beautifully. The cover needs to be sewn tightly to prevent feathers from escaping. Follow the feather cushion tutorial here.
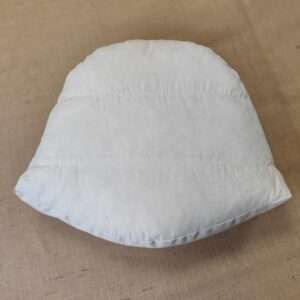
How to create a feather seat cushion
For the cushion cover itself, if your bergère has a T-shaped seat, follow the T-cushion cover tutorial here.
Step three: the back
The back of a bergère is a large, clearly defined surface and one of the most visible parts of the finished chair. Getting it right makes everything else look better.
Keeping the existing back padding
If the padding is still in decent shape but has flattened slightly over time, you don’t necessarily need to rebuild it from scratch. Adding a fresh top layer is often enough to restore the shape before covering.
Building a new back
If the back padding has completely collapsed or was removed during stripping, you’ll need to build a new one. The full process for upholstering the back of a bergère is covered in detail in this tutorial, from the base layer through to the final shape.
Step four: covering
Once all the padding is in place, it’s time to cover. On a bergère, this means working through several separate panels: the inside back, the inside arms, the outside back, and the outside arms. The order matters, and the outside panels need to be finished cleanly with either a hand stitch or backtacking, the same technique used on the bridge chair back.
Is the bergère right for you?
The bergère is not the most complex upholstery project out there, but it’s a step up from a simple dining chair or a bridge chair. If you’ve already done one of those and felt comfortable with the process, you’re ready for a bergère. If this is your very first project, start with a simpler seat first and build up to it. The skills carry over directly, and you’ll tackle the bergère with much more confidence for having done so.
Questions about your specific chair? Share a photo in the forum and we’ll have a look together.
Ever got stuck halfway
through a restoration?
That’s exactly why this space exists. What you just read is the preview — inside, you’ll find everything I don’t publish on the blog.
after sign-up