
Before any fabric goes on, the frame has to be right. This is the step most beginners rush through, and the one professionals never skip. A wobbly joint, a cracked rail, or a dried-out piece of wood will undermine everything that comes after it, no matter how good your upholstery work is. This page brings together everything you need to know to assess, strip, repair, and prepare a wooden chair or armchair frame before you start the real work.
These techniques apply to all wooden frames: a cabriolet, a bergère, a bridge chair, a dining chair, or any other piece with a wooden structure. The principles are the same regardless of the style.
Step one: stripping the frame
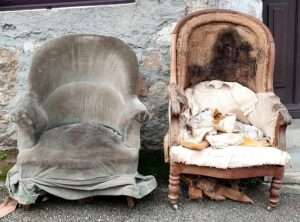
Stripping is the process of removing all the existing upholstery down to the bare frame. This includes fabric, wadding, foam or fibre padding, hessian, webbing, and any tacks or staples holding it all in place. It’s unglamorous work, but it’s essential: you can’t properly assess the condition of a frame until everything is off it, and you can’t make good decisions about what needs repairing until you can see the structure clearly.
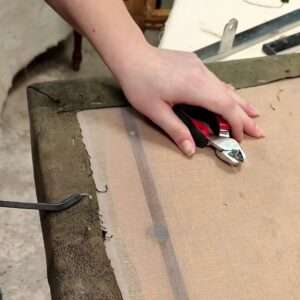
The key tool for stripping is a ripping chisel or a tack lifter, used with a mallet to pop tacks without splitting the wood. Work methodically, always following the grain of the wood when levering, and take your time around joints and carved details where the wood is most vulnerable. Remove everything in layers rather than all at once: fabric first, then wadding, then hessian, then webbing. This gives you a clear picture of how the original upholstery was constructed, which is useful information when you rebuild.
For a full guide to stripping and preparing a frame, all the techniques are covered here:
Safety tips for stripping
Stripping old upholstery is more physical than it looks, and old chairs can harbour a few surprises. A few things worth keeping in mind before you start.
Always wear gloves when stripping. Old tacks are sharp, splinters are inevitable, and some older chairs, particularly those from the mid-20th century, may contain materials you don’t want direct contact with, including old horsehair, dust, and potentially degraded foam that releases particles when disturbed. A dust mask is a good idea if you’re working on a very old or very dusty piece.
Work on a stable surface at a comfortable height. Stripping requires force, and working on a chair that’s wobbling on the floor is both inefficient and hard on your back. A workbench or a sturdy table at the right height makes a real difference. Protect the wooden frame as you work: place a piece of scrap fabric or cardboard between your tool and the wood wherever you’re levering, to avoid leaving marks on visible surfaces.
Finally, and this is the mistake most beginners make: don’t strip more than you need to. Assess each section before you remove it. If the back padding is still in good condition, you may not need to touch it. If the webbing is still solid, you may be able to work over it. Stripping everything down to bare wood is sometimes necessary, but it’s not always the right call.
Security Tips for stripping
Assessing and repairing the frame
Once the frame is stripped, go over every joint, rail, and leg carefully. Press each joint by hand to test for movement. Knock lightly on the frame to listen for hollow sounds that indicate a loose glue joint. Check every leg for cracks or splits, particularly at the point where legs meet the seat rail, which takes the most stress in daily use. A frame that feels solid when upholstered can turn out to have several loose joints once the padding and fabric are removed, because the upholstery itself was holding things together.
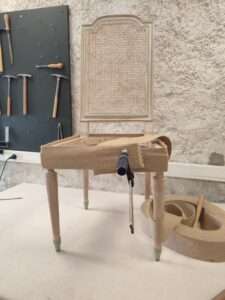
Any joint that moves needs to be reglued before you go any further. Any crack that goes through a structural element needs to be addressed. A repaired frame that’s been properly glued and clamped will outlast the upholstery by decades. A frame that was upholstered over a problem will fail again, and you’ll be back to square one.
Fixing and gluing the wood
For standard frame repairs, broken rails, split joints, and loose legs, this tutorial covers the core technique for cleaning out old glue, applying new glue correctly, and getting the joint back together cleanly.
Fixing and gluing back the wood
Gluing and pressing with webbing
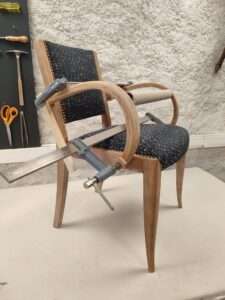
One of the most useful tricks for pressing a glued joint without clamps is to use webbing as a tourniquet. It’s a technique that works on almost any shape of frame, including curved or irregular sections where a standard clamp won’t sit flat. This pro tip is simple, effective, and uses a tool you already have in your kit.
An easy pro tip to glue an press the wood with webbing
Fixing the arm junction on a cabriolet chair
The arm junction is one of the most common failure points on a cabriolet and similar open-arm chairs. It takes lateral stress every time someone sits down or gets up, and the joint tends to open up over time. This tutorial shows a simple, reliable trick for regluing and securing this specific junction cleanly, without disassembling the whole chair.
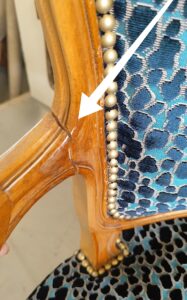
Easy trick to glue an arm junction on a cabriolet chair
Making the wood look new again
Once the frame is structurally sound, there’s one more step before you start upholstering: the wood itself. Exposed frame sections on a cabriolet, a bergère, or any chair with visible wood need to look good because they’ll be on show in the finished piece. Scratches, faded paint, dried-out bare wood, or old wax buildup all need addressing before you cover the rest of the chair.
There are specific products that work particularly well for reviving wooden frames without a full repaint or strip. This tutorial covers the products and the process for getting a tired wooden frame looking clean and considered again, whether it’s painted, waxed, stained, or bare.
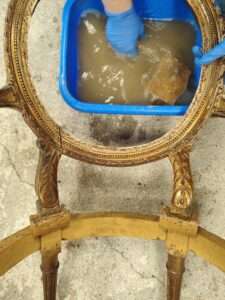
My magic products to make the wood new again
Ready to start upholstering?
Once your frame is stripped, repaired, and looking good, you’re ready to move on to the upholstery itself. Where you go next depends on what chair you have. Pick your project below and follow the tutorials from here.
- Simple dining chair seat: the most accessible starting point.
- Bridge chair: a natural next step after a simple seat.
- Cabriolet chair: a classic French armchair, accessible for beginners.
- Bergère chair: a more involved project with a cushioned seat and fully upholstered sides.
All the tutorials on this page are available in full through the online membership, with video and step-by-step photos for every stage.
Questions about your frame? Share a photo in the forum and we’ll have a look together.